Fedora7にRed5をインストール
気になっていたRed5サーバーをインストールしてみた。その記録です。
Javaのインストール
http://java.sun.com/javase/ja/6/download.html
よりJava SE Development Kit (JDK)・JDK 6 Update 17をダウンロード、インストールします。
antのインストール(入っていなければ)。
Red5のインストール
http://code.google.com/p/red5/
Red5 0.9.0 RC2 (03 November 2009)のTarballをクリック
***********ここから*****************
mkdir /opt/red5/
cd /opt/red5/
tar zxvf ~/red5-0.9.RC2.tar.gz
cd /opt/red5
./red5.sh &
***********ここまで*****************
ps aux | grep red5 <?動作確認
Flowplayerのインストール
http://flowplayer.org/plugins/streaming/rtmp.html から flowplayer.rtmp-3.1.3.zip をダウンロード
flowplayer.rtmp-3.1.3.zip から flowplayer.rtmp-3.1.3.swf を取得
flowplayer.rtmp-3.1.3.swf を /opt/red5/webapps/root に移動
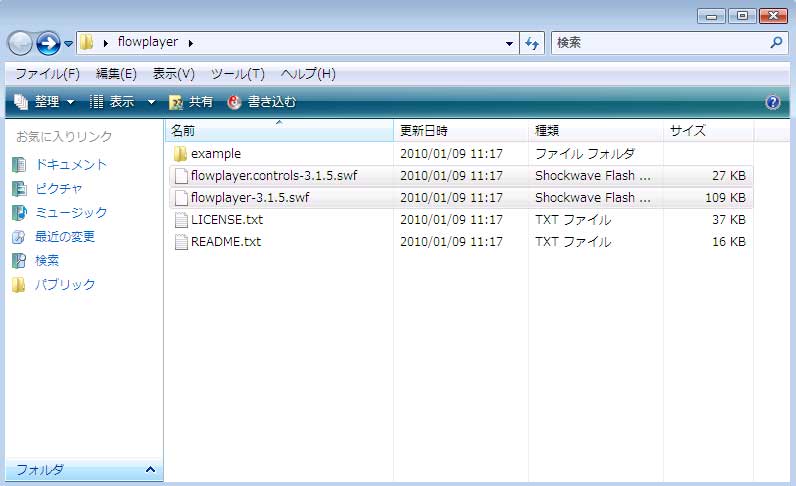
http://flowplayer.org/download/index.html から フリーのものをダウンロード
flowplayer-3.1.5.zipを解凍
flowplayer-3.1.5.swf
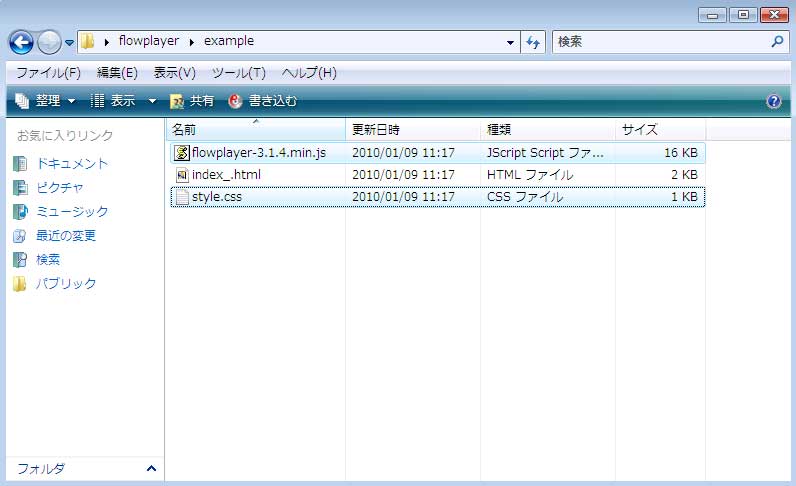
flowplayer-3.1.4.min.js
を /opt/red5/webapps/root に移動
flowplayer-3.1.4.min.js
style.css
を 同じく /opt/red5/webapps/root に移動
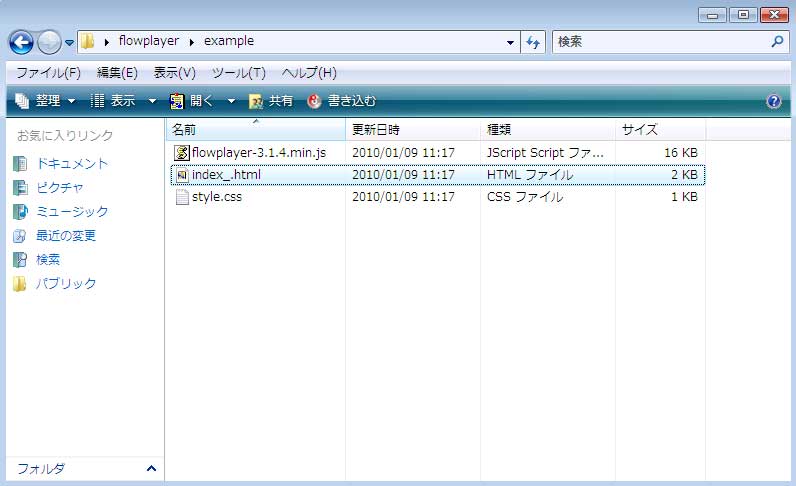
?index.html を index_.html に変えて
/opt/red5/webapps/root/demos に移動
この index_.html をテンプレートとして利用します。
**************ここから**********************
<html><head>
<meta http-equiv=”content-type” content=”text/html; charset=UTF-8″>
<!? A minimal Flowplayer setup to get you started ?>
<!?
include flowplayer JavaScript file that does
Flash embedding and provides the Flowplayer API.
?>
<script type=”text/javascript” src=”../flowplayer-3.1.4.min.js”></script>
<!? some minimal styling, can be removed ?>
<link rel=”stylesheet” type=”text/css” href=”../style.css”>
<!? page title ?>
<title>Minimal Flowplayer setup</title>
</head><body>
<div id=”page”>
<h1>Minimal Flowplayer setup</h1>
<p>View commented source code to get familiar with Flowplayer installation.</p>
<!? this A tag is where your Flowplayer will be placed. it can be anywhere ?>
<a
style=”display:block;width:520px;height:330px” <??最上部の一行を削除した(width:520px;height:330pxは適当に変更)
id=”player”>
</a>
<!? this will install flowplayer inside previous A- tag. ?>
<script>
flowplayer(“player”, “../flowplayer-3.1.5.swf”, { <??ここから改造します
clip: {
url: ‘momo01′,
// configure clip to use influxis as our provider, it uses our rtmp plugin
provider: ‘rtmp’
},
// streaming plugins are configured under the plugins node
plugins: {
// here is our rtpm plugin configuration
rtmp: {
url: ‘../flowplayer.rtmp-3.1.3.swf’,
// netConnectionUrl defines where the streams are found
netConnectionUrl: ‘rtmp://example.com/oflaDemo’
}
}
});
</script>
<!?
after this line is purely informational stuff.
does not affect on Flowplayer functionality
?>
<p>
If you are running these examples <strong>locally</strong> and not on some webserver you must edit your
<a href=”http://www.macromedia.com/support/documentation/en/flashplayer/help/settings_manager04.html”>
Flash security settings</a>.
</p>
<p>
Select “Edit locations” > “Add location” > “Browse for files” and select
flowplayer-x.x.x.swf you just downloaded.
</p>
<h2>Documentation</h2>
<p>
<a href=”http://flowplayer.org/documentation/installation/index.html”>Flowplayer installation</a>
</p>
<p>
<a href=”http://flowplayer.org/documentation/configuration/index.html”>Flowplayer configuration</a>
</p>
<p>
See this identical page on <a href=”http://flowplayer.org/demos/example/index.htm”>Flowplayer website</a>
</p>
</div>
**************ここまで**********************
画像を/opt/red5/webapps/oflaDemo/streams に移動する。
これで見れるはず
外部のPCから
http://サーバー名:5080/demos/*********.html(任意)
http://stream.image-house.co.jp:5080/demos/momo2009-02-01.html
http://stream.image-house.co.jp:5080/demos/momo2009-02-02.html
http://stream.image-house.co.jp:5080/demos/momo2009-02-03.html
http://stream.image-house.co.jp:5080/demos/momo2009-02-07.html
http://stream.image-house.co.jp:5080/demos/momo2009-02-08.html
http://stream.image-house.co.jp:5080/demos/momo2009-04-16.html
http://stream.image-house.co.jp:5080/demos/momo2009-04-22.html
http://stream.image-house.co.jp:5080/demos/momo2009-09-19.html
http://stream.image-house.co.jp:5080/demos/momo2009-12-12.html
注意:ルーター・ファイヤウォールそれぞれポートを開けてください。
最低限: 5080 と 1935
追記:こちらもご覧ください
red5再構築
https://www.image-house.co.jp/modules/d3blog/details.php?bid=20
?


